Tutorial: How to Setup Google DFP for Selling Ads
DoubleClick for Publishers (DFP), earlier known as Google Ad Manager,
lets you sell direct ads on your website. This step-by-step tutorial
will help you quickly get started with DFP.
Ads by Google India free classifieds www.olx.in
Buy and sell, it's 100% free: Apartments, jobs, cars, anything!
Say
you use an advertising network like Google AdSense for serving ads but
also accept direct advertisers on your website? Or have you signed up
with multiple ad-networks but, due to limited ad space on your site, you
will only like to run ads from the network that pays you the most money
(read maximum CPM)?Buy and sell, it's 100% free: Apartments, jobs, cars, anything!
You may choose to run banner ads, text ads or even rich-media (like video and flash ads) through DFP. The tool, which was formerly known as Google Ad Manager, requires no downloads or installation and any website publisher can sign-up for the DFP program as long as they have an active Google AdSense account.
Sell Your Advertising Space with Google DFP
Say you have a news website (or a blog) where you cover topics such as technology, sports, entertainment and so on. An advertiser wants to serve banner ad campaigns on all your tech related pages. He will pay $20 CPM for all US based impressions (see order) and you can fill your remnant inventory through Google AdSense ads.Let’s see how we can easily setup such an ad campaign through Google DFP.
Step 1: Create Ad Units
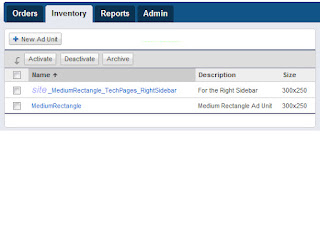
We need to tell DFP about the advertising space on our web pages. For instance, in our above example, we’ll have to create three ad slots for the 300×250 rectangle, the 160×600 skyscraper and the 468×60 banner. These are standard IAB units though you are free to define custom ad sizes as well.
Step 2: Define Placements
You have multiple ad units on the same page and there’s a possibility that an advertiser may want to place ads on more than one unit. Therefore, we need to create a placement which is like a group of one or more ad units where an advertiser’s ad can be displayed.
Go to Inventory tab – > Placements – > New Placement and define the placement. To keep things simple, we will associate only one ad unit (the 300×250 one) with our ad placement. Check the option that says “Offer this placement to advertisers” through AdWords and DoubleClick Ad planner to attract more advertisers.
Step 3. Create an Order
Now that we have defined our ad inventory, it’s time to feed in the client’s order. The advertiser will specify where he wants to place the ad, what kind of demographics he wants to target, what’s the price he is willing to pay and how long will the campaign run on our site.
Go to DFP – > Orders – > New Order. Create a company for the advertiser and then fill in the order details under “new line item.” Set the Type to “Price Priority” if you want the highest paying ads to be served on your site. Set Value CPM equal to the price that the client will pay and then add the targeting criteria.
Step 4. Upload the Ad Creative
It’s time for your to upload the “actual ad” that will display on your web pages. You can either upload images, Flash videos or even snippets of HTML and JavaScript in case you’re going with text ads.
Go to DFP – > Line Items and select the “Line Item” that you’ve created in the previous step. Click Add Creatives – > New Creative and upload the image / SWF Flash file. You can even upload multiple creative ads per line item and they’ll display evenly across that site – this helps you determine an appropriate ad copy that performs best with your visitors.
Step 5. Get the Ad Tags for your Site
We are almost done. All we need to do is get the JavaScript code from Google Ad Manager DFP and copy-paste it into our blog’s template.
Click the Inventory tab in your DFP dashboard and choose “Generate Ad Tags” – select the appropriate ad unit (the one that we created in Step #1) and choose “Generate Tags.” Add this code to your website and within 10-15 minutes, the DFP tool should start serving ads on your pages.


No comments:
Post a Comment